Picture-perfect plates: essential food photography tips
In today’s social media-driven world, food photos have become an essential part of the dining experience. Whether you're showcasing your culinary creations on Instagram, blogging about recipes, or simply capturing food memories to look back on, food photography plays a huge role in making your dishes look as appetizing as they taste.
The good news is that you don’t need a professional camera or complex editing software to create beautiful food photos. By following some simple food photography tips and using the right props, you can elevate your food photos to a whole new level.
In this guide, we’ll cover everything you need to know about how to take food photos, including:
- What is food photography?
- The art of presentation
- Food photography composition
- Shooting in natural light
- Photography backgrounds
- Choosing tableware for food photos
- Food photography props
- Food photography editing tips
What is food photography?
Food photography is the art of capturing visually appealing images of food, often used to showcase dishes in cookbooks, magazines, adverts, cooking blogs, and on social media. It focuses on highlighting the colors, textures, and details of food, making it look as delicious as it tastes.
Effective food photography combines technical elements, such as lighting, composition, and editing, with food styling and presentation, resulting in images that entice viewers. The goal is to create a feast for the eyes, often using props, background settings, and angles that complement the dish.
So, how can you apply these techniques at home? Regardless of your photography experience, we’ve put together some simple yet effective tips to elevate your food photography, helping make your dishes look irresistible and leave your audience hungry for more.
Learn the art of presentation
In culinary terms, food presentation refers to the art of decorating, styling, and arranging a dish in a way that adds to its visual appeal. Creative presentation plays a crucial role in restaurant food photography, but you might also want to consider it when you’re taking food photos at home. A well-plated dish is appreciated by diners and photography enthusiasts alike!
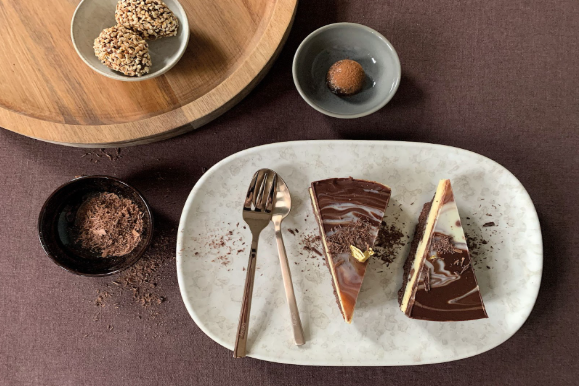
Food texture is a key element when it comes to food presentation. Sauces, oils, and foams are all versatile options which are great for creating interesting shapes and colors on the plate. You could experiment with contrasting colors — a drizzle of green dill oil will look beautiful atop a vibrant beetroot soup, for example. Crunchy elements like nuts or breadcrumbs can be sprinkled over a dish to add a layer of interest, while a sprig of rosemary or a dusting of icing sugar is simple yet effective.
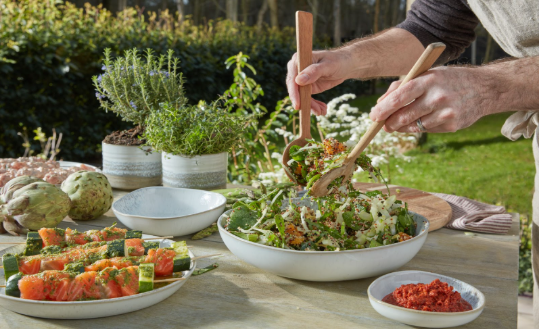
When it comes to food placement, fanning out sliced meat or crudites is an elegant way to present food for a flat lay, while stacking elements to create height works beautifully for side-on shots. If photographing pasta or noodles, twirl them into a tidy nest, allowing the sauce and toppings to be clearly visible.
There are endless ways to play around with presentation, so don’t be afraid to get creative with it! Just remember, your goal is to engage the viewer while highlighting the natural beauty of your ingredients, so be sure to take photographs where the food is your main focal point.
Composition is key
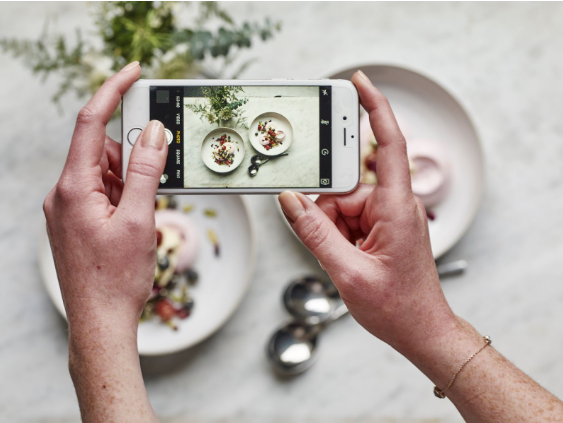
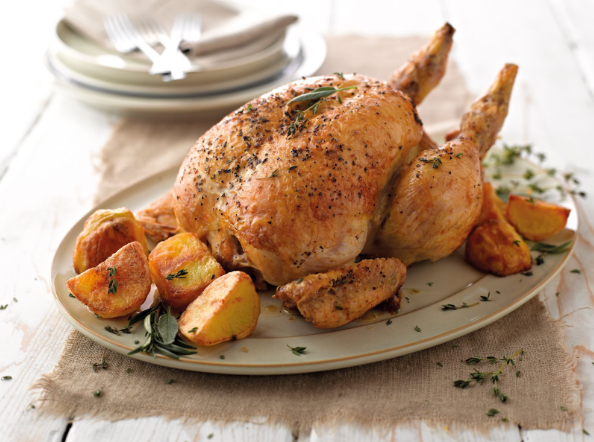
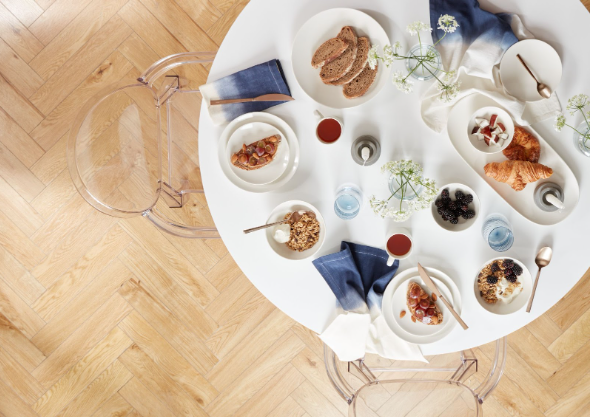
Composition is an essential aspect of any great photograph, and food photography is no exception. One of the most important elements of composition is the angle from which you shoot, and this will depend on the dish you're photographing. For instance, if you’re shooting something like a pizza or perhaps a tapas-style meal with lots of elements, a bird’s-eye view works well. A close-up, side-on shot is ideal for showcasing a sandwich or a stack of pancakes, where layers and texture are just as important as the outer appearance.
When setting up your shot, the end result should appear harmonious. A popular technique to ensure balance in a frame is the rule of thirds. Imagine your frame divided into nine equal parts, with two horizontal and two vertical lines. Positioning the most important elements of your dish along these lines will draw the eye towards them, while less important props can subtly blend in.
Shoot in natural light
Lighting is one of the most important aspects of food photography. Where possible, use natural light to illuminate your dishes, with matte tableware to reduce any glare. Shooting near a large window with indirect sunlight will provide soft, flattering light that doesn’t throw harsh shadows or create any overexposed areas. Essentially, the key is to avoid using artificial lighting or flash, which can make your food look unnatural.
If shooting outside is an option, the “golden hour” — the hour just after sunrise or just before sunset — is a great time to take your food photos. With its warm tone, the natural sunlight will allow the colors and textures of your food to pop.
Pay attention to background
The backdrop you shoot against can make the difference between good and great food photography. A cluttered or distracting background can draw attention away from a dish, whilst a clean, simple background allows your food to shine.
If you’re working with a busy or colorful dish, try using a plain wooden table or a stone countertop as the base for your shot. White or neutral-toned plates or serving platters can help a dish look more vibrant. A wooden cutting board or a marble slab can add just the right touch of texture to frame your food without stealing the spotlight.
Choose the right tableware
If your food is the art, think of your tableware as the canvas. Selecting the right tableware for presenting your dishes will make a huge difference to the overall result of your food photos.
Here are some tips for choosing tableware:
- Smaller is better: Using a plate that’s too big can make it more difficult to get the whole thing in frame. What’s more, using a small plate or a salad plate can help reduce empty space, so your dishes look abundant and hearty.
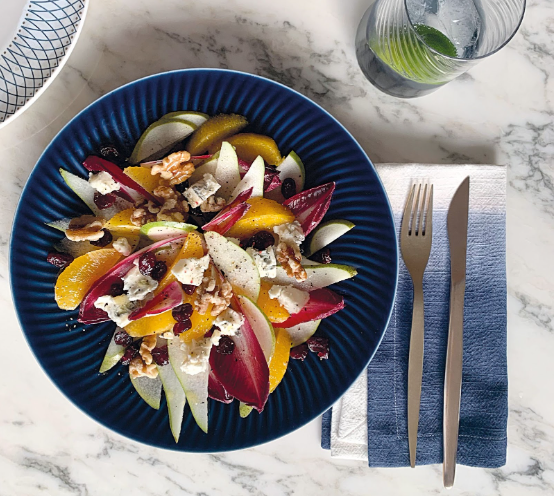
- Think shape: If you’re photographing a dish with a lot of elements, like a colorful salad, choose a flat dinner plate or a wide and shallow pasta bowl. This will allow you to showcase every element of the dish.
- The depth factor: Imagine you’re shooting a stack of pancakes or a juicy burger. You’re probably shooting side-on to showcase all your mouthwatering layers. Choose a plate with little to no lip to avoid blocking any part of your dish.
- Use color sparingly: Most food photography features dishes displayed on white or neutral-toned plates. While neutrals are great for allowing the food to speak for itself, that doesn’t mean you can’t experiment with a splash of color here and there. Think about complimentary colors. Imperial Blue can look stunning in contrast to the yellow shades of a butternut squash puree or a poached egg yolk, while rich Greenwich green will make raspberry, pomegranate, and beetroot elements pop.
Use food photography props
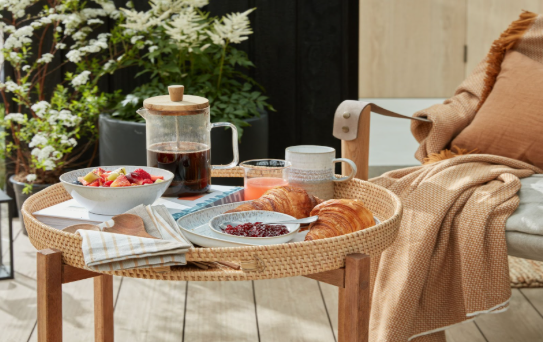
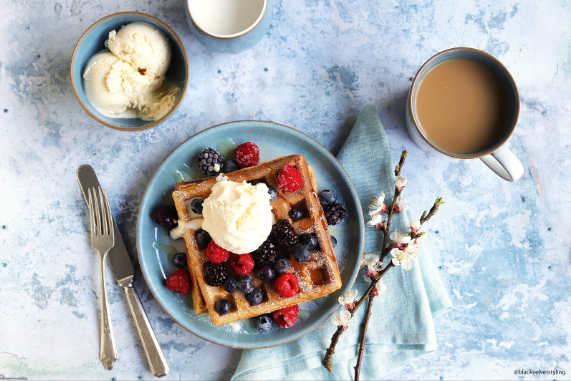
Props are a great way to add interest to your food photography without overshadowing the main subject. Jugs, vases, napkins, glassware, silverware, table linens, and fresh ingredients from the dish all help tell a story, whilst adding a pop of color and texture that can look really effective.
When choosing props, make sure they complement the style of your food. For example, if you’re photographing some freshly baked scones, incorporating some floral table linens, a sugar bowl and a stoneware teapot will give your photograph that elegant afternoon tea feel. If you’re shooting a rustic summer feast, some linen napkins, fresh-cut flowers or herbs, and some speckled earthenware will add vibrancy and a natural look.
Edit your food photos
Once you've wrapped your shoot, a little bit of post-processing goes a long way when it comes to bringing out the natural beauty of your food photos. The key here is subtlety: fine-tune your image by adjusting the brightness, contrast and saturation, but avoid over-editing. You don’t want to end up with a picture that looks unrealistic!
If you’ll be posting your food photography on social media, ensure your final image fits the platform's requirements. For example, Instagram typically works best with square images, while platforms like Pinterest tend to prefer vertical formats.
By following these food photography tricks, you can turn your homemade dishes into visually stunning works of art. No matter whether you’re an amateur or a seasoned food photographer, incorporating Denby’s hand-crafted, high-quality pieces into your photos is a great way to give your images a touch of elegance and artistry. Whether you're capturing a simple meal or a gourmet feast, shop Denby tableware to enhance any dish, making your food photos look even more delicious.